
Table of Contents
- General Information
- Getting Started
- Disassembling
- Machine Hotspots
- Discovery and Manufacturing
- Leveling your gear
- Tech Trees
- Recommended leveling methods
- Capes of Accomplishment
To get started on Invention, you must have the following skills up to level 80.
If you do not have these levels, the icon will be dimmed, indicating it is locked. If you do have the levels, it will light up brightly, indicating it is unlocked.
The Invention skill goes up to level 120, however, the experience curve is different in order to make early levels slower and higher levels faster. Despite the curve, Level 99 is around 36 million experience and level 120 is around 80 million experience. Like other skills, total experience possible in the skill remains 200,000,000.
Once you have the required levels, head to the building carved out of the mountain rock North of Falador.
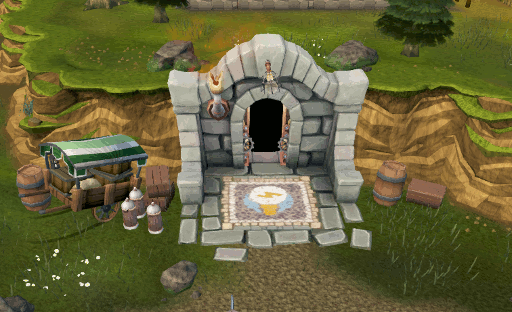
Upon entering the Invention Guild, Doc will be on your far right, and Grubfoot will be on your left with his Mind-controlled monkey butler. Doc will introduce the beginnings of Invention and then point you in the direction of the Workbench, which is right next to him to begin the tutorial. The tutorial will add a charge pack, inventor's tools, and a material pouch to your toolbelt.
Note: There are two parts to the workbench, "Discover" and "Manufacture" using each of these will pull up different options within the workbench.
Once you have unlocked Invention, you will receive two new abilities and a special Invention pouch. The abilities are Disassemble and Analyze.
- Analyze - A spell in your spell-book that analyzes the junk-chance and what an item can disassemble into.
- Dismantle spell - An icon at the bottom of your inventory (or in your spellbook) in which you can drag and drop to dismantle an item.
The first way you can train Invention with is Disassembling. Using the ability Disassemble, you can turn many items in RuneScape into materials. There are a plethora of materials you can obtain from this method. Disassembling items give up to 12 standard components, up to 7 rare components, and junk. Every item has a specific chance of obtaining any one of those things. Disassembling higher tier equipment has a lower junk chance and higher chance at obtaining rare components.
Not all items within Gielinor can be disassembled, living creatures or objects for example. Almost anything alchable, and their noted items, can be disassembled. Runes, ammunition, and other stackable items disassemble in 50 items per action; everything else is 1 item per action.
These are some of the materials you can obtain from disassembling. These allow you to make various devices and perks.
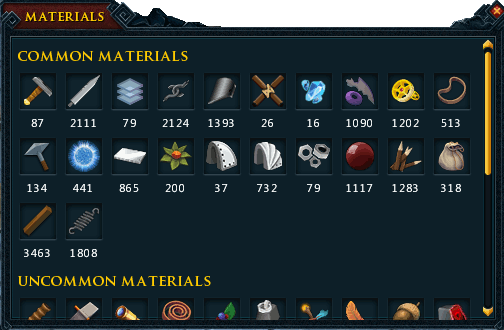
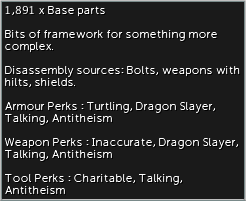
You obtain rarer components from disassembling higher level items. Hovering over the icon shows Material Information, such as how you can obtain it and what perks it can be used for.
You can obtain any material at any level, but you will require a certain Invention level to use some of them.
Disassembling items is not limited to things that you can Smith, Fletch, and Craft. Monsters also can drop pieces of salvage which can be disassembled for components. There are a total of 120 distinct types of salvage that can be separated into six tiers, five sizes, and four types. The names of salvage always follow a specific format: "Size" "type" "tier" salvage. So for example Tiny bladed bronze salvage.
There are a total of 5 sizes of salvage. The sizes multiply the base high alchemy value and the component rate. It is also related to the number of bars that were used to create the types of items that salvage replaced when they were added. For example: Daggers, hatchets, maces, med helms, limbs, swords, gauntlets, boots, claws, spears in Bronze through Adamant items were replaced by Tiny sized salvage on Monster drop tables and provide the same type components.
| Size | "Bars"/Multiplier | Equipment Replaced |
| Tiny | 1 | Daggers, hatchets, maces, med helms, limbs, swords, gauntlets, boots, claws, spears |
| Small | 2 | Scimitars, pickaxes, longswords, full helms, square shields |
| Medium | 3 | Warhammers, battleaxes, chainbodies, kiteshields, 2h swords, platelegs, plateskirts |
| Large | 4 | None |
| Huge | 5 | Platebodies, halberds (2 salvage per) |
Note that due to alch values, Rune items have a different conversion table as seen below.
| Size | "Bars"/Multiplier | Equipment Replaced |
| Tiny | 1 | Daggers, hatchets, maces, med helms, limbs, swords, gauntlets, boots, claws |
| Small | 2 | 2h crossbow |
| Medium | 3 | Scimitars, pickaxes, longswords, full helms, square shields, warhammers, spears |
| Large | 4 | Battleaxes, chainbodies, kiteshields, 2h swords, platelegs, plateskirts |
| Huge | 5 | Platebodies, halberds (2 salvage per) |
There are 4 types of salvage that can be disassembled. These are related to the style of weapons that they replace and thus the components that you obtain from them.
| Type | Components | Equipment Replaced | |
| Often | Rarely | ||
| Bladed |  Base parts Base parts Blade parts Blade parts Metallic parts Metallic parts |
 Dextrous components Dextrous components Sharp components Sharp components Subtle components Subtle components |
2h swords, Battleaxes, Halberds, Hatchets, Longswords, Scimitars |
| Blunt |  Head parts Head parts Smooth parts Smooth parts Stave parts Stave parts |
 Direct components Direct components Strong components Strong components Stunning components Stunning components |
Maces, Warhammers |
| Plated |  Cover parts Cover parts Deflecting parts Deflecting parts Plated parts Plated parts |
 Heavy components Heavy components Protective components Strong components Protective components Strong components |
Boots, Chainbodies, Full helms, Gauntlets, Kiteshields, Med helms, Platebodies, Platelegs, Plateskirts, Square shields |
| Spiky |  Connector parts Connector parts Crafted parts Crafted parts Spiked parts Spiked parts |
 Light components Light components Precise components Precise components Swift components Swift components |
2h crossbows, Claws, Daggers, Limbs, Pickaxes, Spears, Swords |
There are 6 salvage tiers that correspond to the different types of metals from Bronze to Rune. These are related to the base alch value that you can receive for these items as well as your chance of obtaining junk when disassembled. Keep in mind that the alch value will be affected by the size of your salvage. For example a Tiny bronze salvage will only grant you 20 coins and 3 components, however, a Huge bronze salvage will grant you 100 coins and 15 components.
Note that salvage below Medium Adamant are not worth Alching with your Spring cleaner as the value is less than what it would cost you for Springs.
| Tier | Base Alch Value | Base Junk Chance |
| Bronze | 20 | 98.9% |
| Iron | 65 | 89% |
| Steel | 240 | 78% |
| Mithril | 600 | 67% |
| Adamant | 2,000 | 56% |
| Rune | 8,000 | 45% |
Below you will find a table of all 120 types of salvage. Click image for more information about that type of salvage.
| Size | Bladed | Blunt | Plated | Spiky | Bladed | Blunt | Plated | Spiky | Bladed | Blunt | Plated | Spiky | ||
| Bronze | Iron | Steel | ||||||||||||
| Tiny |  |
 |
 |
 |
 |
 |
 |
 |
 |
 |
 |
 |
||
| Small |  |
 |
 |
 |
 |
 |
 |
 |
 |
 |
 |
 |
||
| Medium |  |
 |
 |
 |
 |
 |
 |
 |
 |
 |
 |
 |
||
| Large |  |
 |
 |
 |
 |
 |
 |
 |
 |
 |
 |
 |
||
| Huge |  |
 |
 |
 |
 |
 |
 |
 |
 |
 |
 |
 |
||
| Mithril | Adamant | Rune | ||||||||||||
| Tiny |  |
 |
 |
 |
 |
 |
 |
 |
 |
 |
 |
 |
||
| Small |  |
 |
 |
 |
 |
 |
 |
 |
 |
 |
 |
 |
||
| Medium |  |
 |
 |
 |
 |
 |
 |
 |
 |
 |
 |
 |
||
| Large |  |
 |
 |
 |
 |
 |
 |
 |
 |
 |
 |
 |
||
| Huge |  |
 |
 |
 |
 |
 |
 |
 |
 |
 |
 |
 |
||
Within the Invention Guild there are several Machine hotspots. Machines are a great way to take some of the workload out of Invention. They can disassemble items, high alch them, tan hides, and complete several other time consuming tasks. If you want to learn more about them, visit our Invention machines special report. It will tell you what you need for the machines and how to work them.
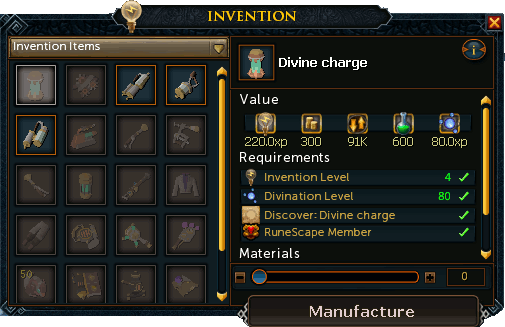
To discover new items to make, you will need to increase your Invention level. As you discover these new items, you will need to complete an activity to unlock them. The closer you are to a "Perfect" combination and placement of parts, the more experience you will gain when you research it.
In order to research these new discoveries, you will need to interact with a workbench. Workbenches can be found in the following locations:
Devices are inventions you can create at workbenches once you've unlocked them. Creating devices requires materials and occasionally energy from the Divination skill. You will be able to sell some devices on the Grand Exchange.
There are a handful of primary devices you will use while training the Invention skill. Below we have 3 of the most important ones you will need.
- Augmentors - They allow you to create augmented equipment by using them on one of many eligible items.
- Charge-Pack - Automatically unlocked after the tutorial. The charge-pack will override the degrade system on augmented items. The charge drain is the rate at which you use charges from your charge pack.You can re-charge your charge pack by creating or using Divine charges.
- Gizmos - Gizmos aid you in perk creation and allowing you to equip them to augmented items. These devices will be needed the most in order to train the Invention effectively. There are 3 types of gizmo shells:
Perks are benefits that provide a status effect while using an augmented item.
In-order to create perks, you require materials gained from disassembling and a gizmo shell. Keep in mind that the type of shell you use MUST match the type of item you will be attaching it to. In the gizmo shell, you can drag and drop the components to generate a list of possible perks.
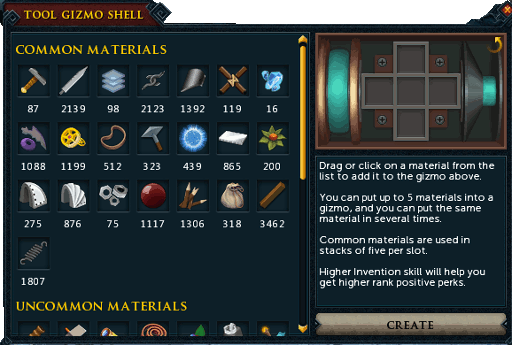
Upon clicking "Create", the gizmo will randomly select and attach 2 perks out of the list to itself, and you will receive a chunk of experience.
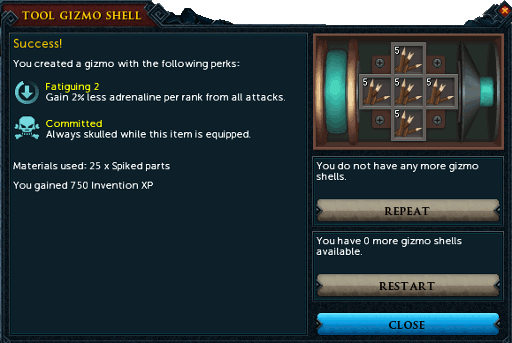
Using the restart button allows you to use another gizmo in your inventory to create perks. Using the repeat button allows you to generate new perks using another gizmo and the exact same materials. Perks with numbers have multiple ranks provide a higher level of degrees of that perk.
Perks can provide negative, neutral, and positive status effects. The best perks are primarily obtained from rare materials. Similar perks do not stack and they prioritize the higher ranked version of the perk in use. Once a gizmo has perks you will be able to use it on augmented weapon, armor, or tool as applicable. Each item can only hold one gizmo with the exception of 2h weapons, which can hold two. You can receive tools to remove gizmos and return augmented weapons and vice-versa. For a list of perks that can be created and what components are necessary, see our Invention Perks guide.
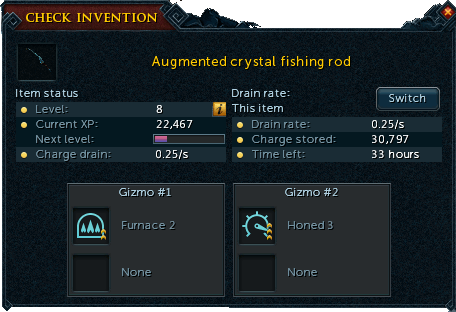
In order to augment an item you will need to use a device known as an Augmentor on an augmentable item. Augmenting an item allows you to level-it-up by gathering combat or skilling experience, however, it does not change it's stats.
In order to use Augmented items you must have charges in your charge pack. The charge drain is the rate at which you use charges from your charge pack. You re-charge your charge pack by using Divination charges. All your equipment derives from the same charge pack and, therefore, if you run out of charge your augmented items will act as level 1 items - useable, but HIGHLY ineffective.
You can check your Divine charges and perks on augmented items by right clicking and selecting "Check".
Please bear with us! We're working on this!
Tech Trees are branches of Invention that unlock various extra devices and materials.
Upon starting invention, you unlock the Human Tech Tree. Once you reach level 40, you choose a second Tech Tree to focus on - either Cave goblin or Dwarven. Specializing in one of these 2 Trees means that you will earn 50% more currency for completing tasks within that Tree.
Note: you can change which Tech Tree you specialize in, however, it will cost 100 currency of your current Tree. You will need to speak with Drorkar or Oldak to specialize in their Tech Tree.
Most tasks for the Tech Trees involve handing in components or devices. A new task is added to your list each day at reset. Much like the Challenge System, you can have up to 5 that can be completed. Note that these tasks will remain until you complete 1 or more of them, they will not change.
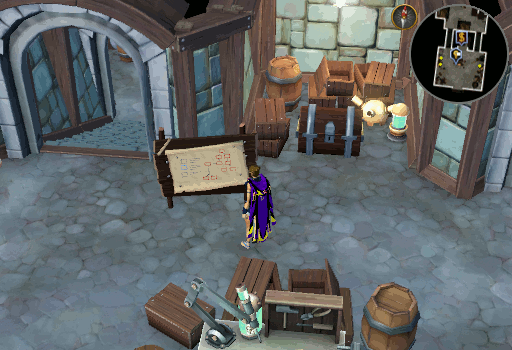
To begin a task, you will need to open the Technology noticeboard found within the Invention Guild. Left clicking will give you the option to choose which Tree's task list you would like to view. Right clicking and choosing "Technology" will show you the various device blueprints you can unlock.
When you complete a task you will earn either 10 or 15 currency in your current Tech Tree, depending on if it is your specialized Tree or not. This currency can only be spent within it's respective Tech Tree. This means that you will need to complete tasks from the Dwarven tree to unlock Dwarven blue prints and Goblin tasks for Goblin blueprints.
Both Tech Trees have 8 different devices which you can purchase the blueprints for and components which you can now use. These are broken down into 4 different tiers which require a specific Invention level to access. In order to unlock all 16 Blueprints
| Tier | Level | Currency | Blueprints | |
| Dwarven | Goblin | |||
| 1 | 40 | 10 | Corporeal components | Pestiferous components |
| 2 | 50 | 25 | Sprinkler MK1 Mining accumulator |
Mechanised chinchompa Woodcutting accumulator |
| 3 | 60 | 35 | Book switcher Calorie bomb |
B.A.N.K. Stander Monkey mind-control helmet |
| 4 | 70 | 55 | Auto-sanctifier Kinetic cyclone Dungeoneering lock melter |
Dungeoneering party simulator Electrified box trap Oldak coil |

Once you have achieved level 99, you may visit Doc to purchase an Invention cape for 99,000 Coins.

Once you have achieved level 120 (approximately 80 million experience), Doc will sell you the Invention Master Cape for 120,000 Coins.
Discount
Note that as of December 2018, another one of Mod Daze's Easter Eggs have been found. This enables you to purchase a Skillcape for half price (only from Doc, not Elen) if you are wearing a Ring of Charos (a). Be aware that "Half price" is 92,000 Coins as the experience at level 92 is approximately half way to level 99.
This Skill Guide was written by DarkPyroNinja and Rooskii. Thanks to Jarkur, ChathMurrpau, and Fuzzyjoe162 for corrections.
This Skill Guide was entered into the database on Sun, Feb 28, 2016, at 02:57:00 AM by Jarkur, and it was last updated on Mon, Sep 02, 2019, at 04:21:33 AM by Chath.
If you see this guide on any other site, please report it to us so we can take legal action against anyone found stealing our content. This guide is copyrighted by RuneHQ, and its use on other sites is expressly forbidden. Do not ask if you can use our guides or images, the answer is and always will be NO!
Print this page with images - Back to the Skill Guide Index Page - Back to Top